PhpStorm Logo 
Xdebug Logo
Introduction to PhpStorm Xdebug Setup
PhpStorm Xdebug Setup In Windows is a guide designed for people who with a correctly working PHP installation including Xdebug. If your system does not have this, Setup PHP On Windows With Debugging can help. This blog post is part of a new series of blogs covering setting up development environments.
Install Browser Plugins – PhpStorm Xdebug Setup
Visit this page for browser plugins information on the JetBrains Support pages. This section is done first so this is all set up ready to go when creating the PhpStorm project.
- Chrome Xdebug Helper Chrome Web Store
- Firefox Firefox Xdebug Helper
Create A New Project
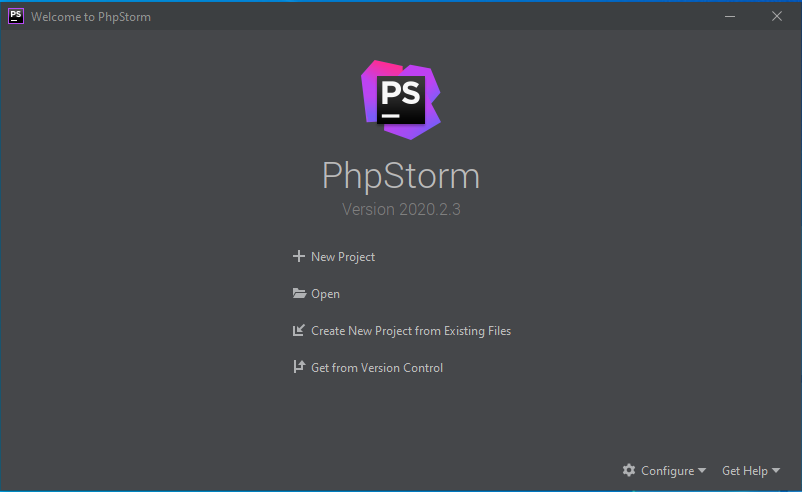
PhpStorm New Project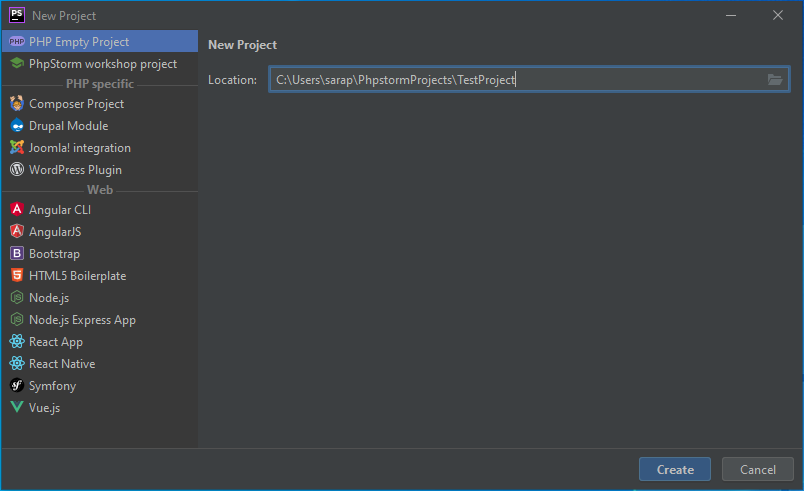
PhpStorm Create Empty PHP Project
There are now several setup stages to complete before debugging will fully function. Some of these are permanent settings in PHP, but most are on a per-project basis. Except for installing browser plugins, all the other headings below correspond to items in the settings menu of PhpStorm.
Create A Basic PHP File To Test With
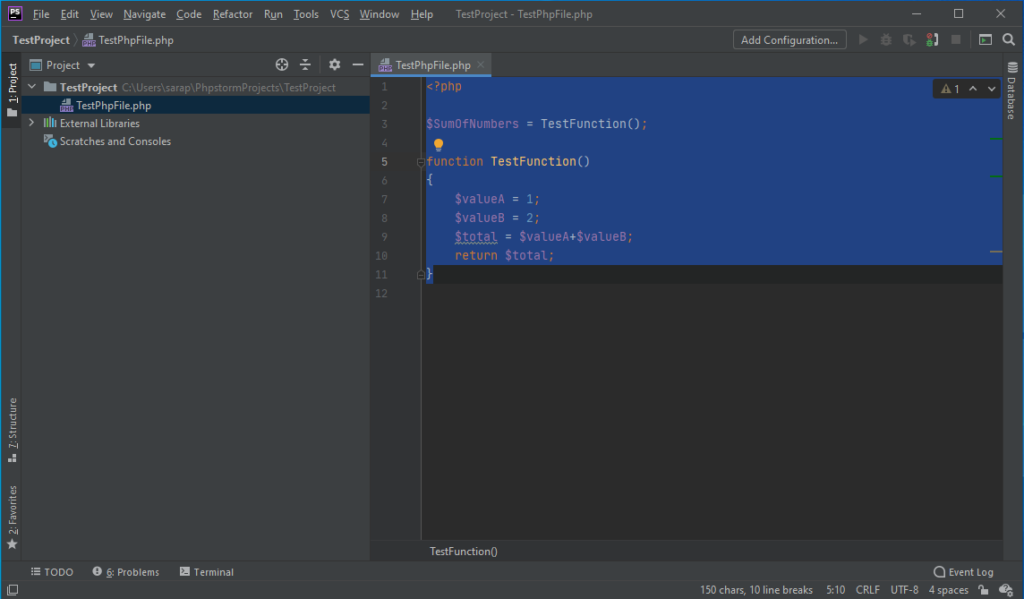
Add some very basic PHP and save the file.
<?php

$SumOfNumbers = TestFunction();

function TestFunction()
{
    $valueA = 1;
    $valueB = 2;
    $total = $valueA+$valueB;
    return $total;
}
Next there are a number of items to set in the settings menu.
- Plugins (Inside the Settings Menu)
- Build, Execution, Deployment (Inside the Settings Menu)
- Language And Frameworks (Inside the Settings Menu)
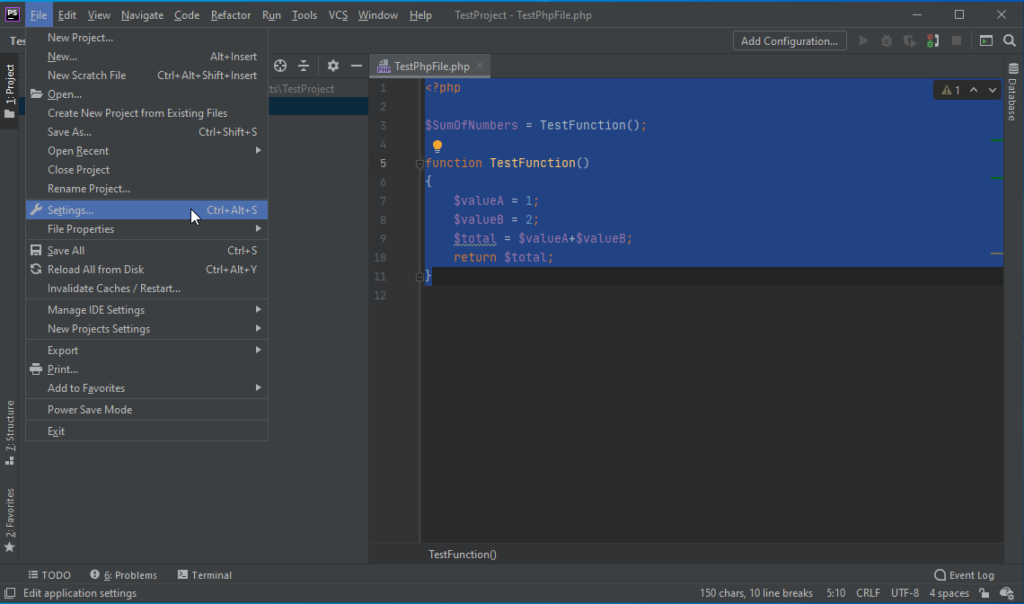
PhpStorm Settings Menu Highlighted 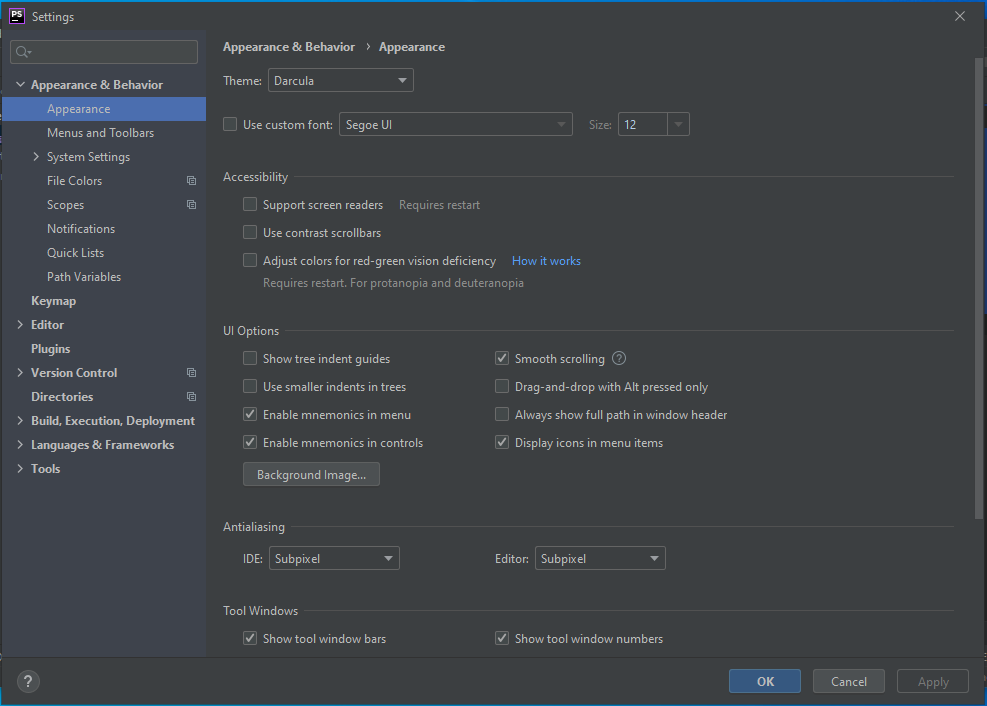
PhpStorm Settings Menu Displayed
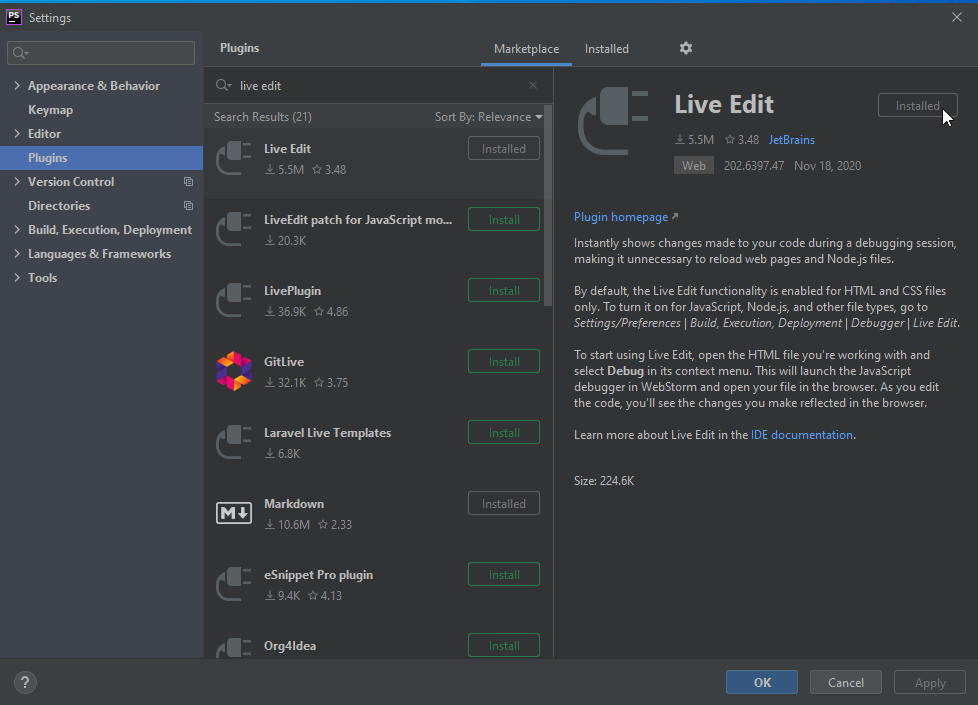
Settings – Plugins – PhpStorm Xdebug Setup
- Install the Live Edit plugin
Build, Execution, Deployment – PhpStorm Xdebug Setup
Debugger
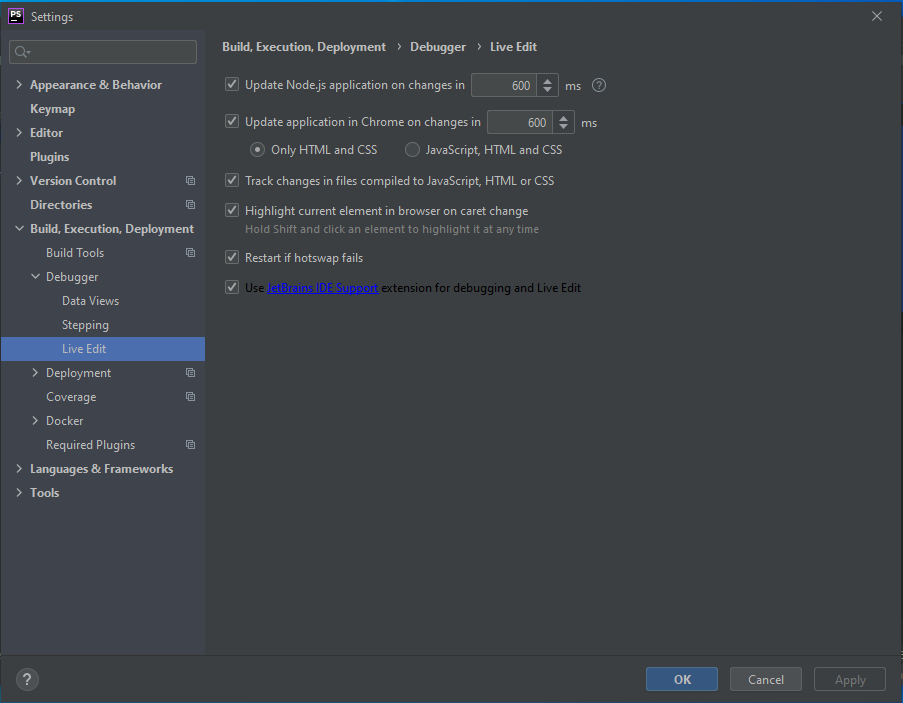
Live Edit
- Check Update Node.js
- Update Application in Chrome on changes in – Javascript, HTML and CSS
- Check Track Changes in files compiled to Javascript, HTML or CSS
- Check Restart if hotswap fails
- Check Use Jetbrains IDE Support extension for debugging and live edit.
Deployment
- Click the + Button
- Choose Local or mounted folder
- Call It LocalHost (or anything you like)
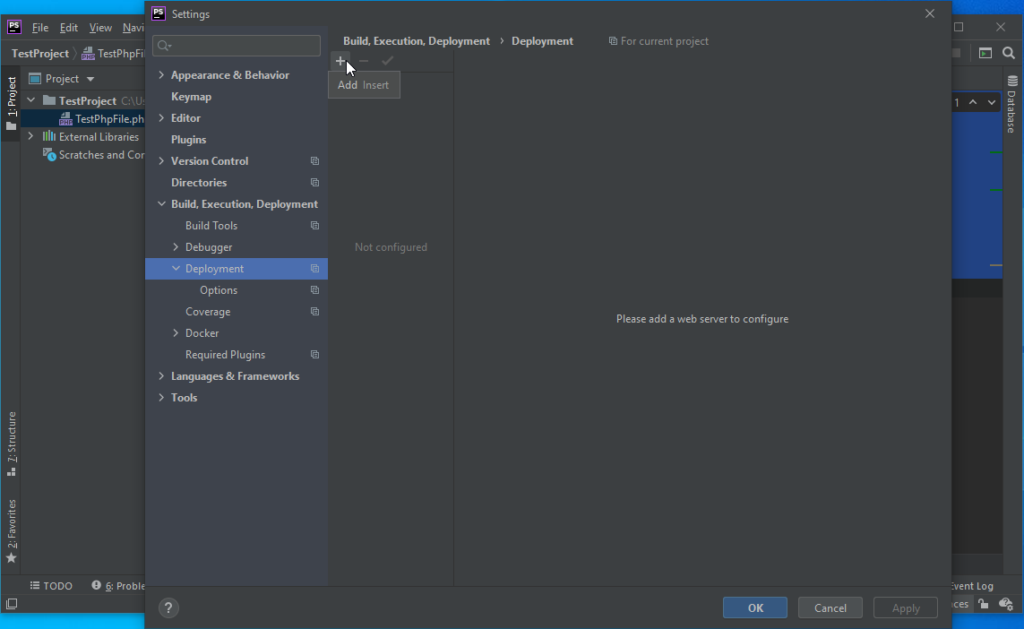
PhpStorm Deployment Add New Deployment 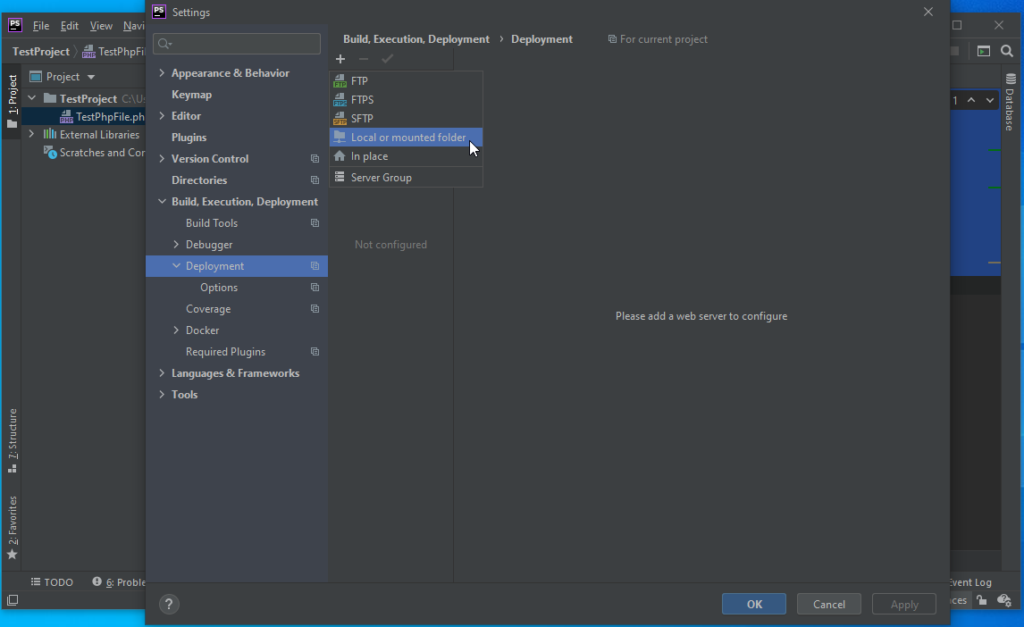
PhpStorm Add Local or Mounted Folder
Connections Tab
The connections tab sets the folder where the deployment is. By default with Apache under Windows, the default localhost folder is C:\Apache24\htdocs.
- Click the browse button in the folder section
- Navigate to the default localhost file location on your system
- Click the +Folder icon to add a new folder
- Call it ‘TestProject’ (or another name if you are not following this guide)
- Update the Webserver URL to match the same name (http://localhost/TestProject’)
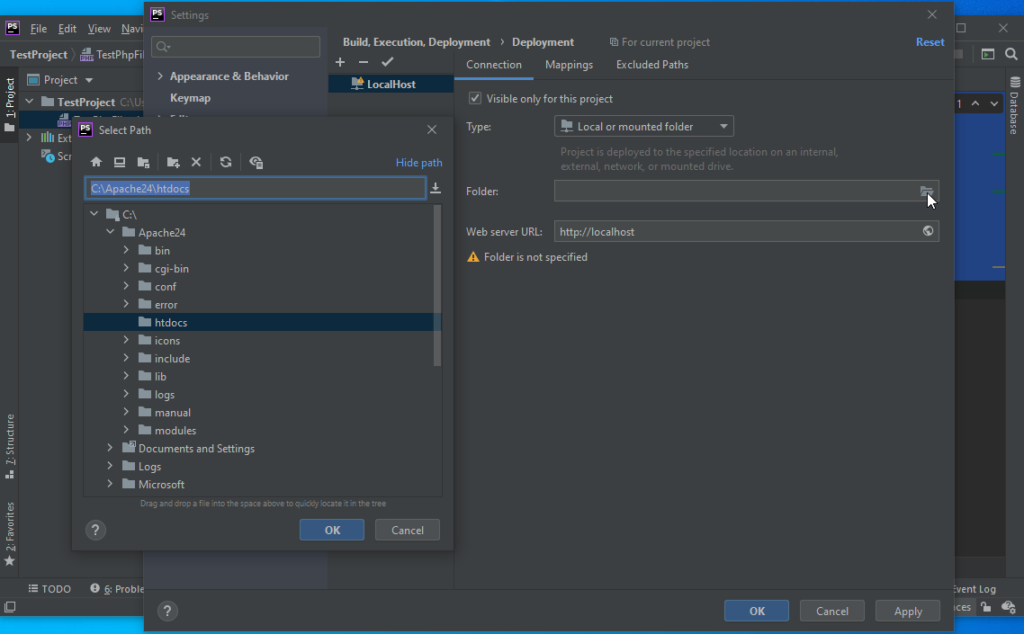
PhpStorm Deployment Set Deployment Folder 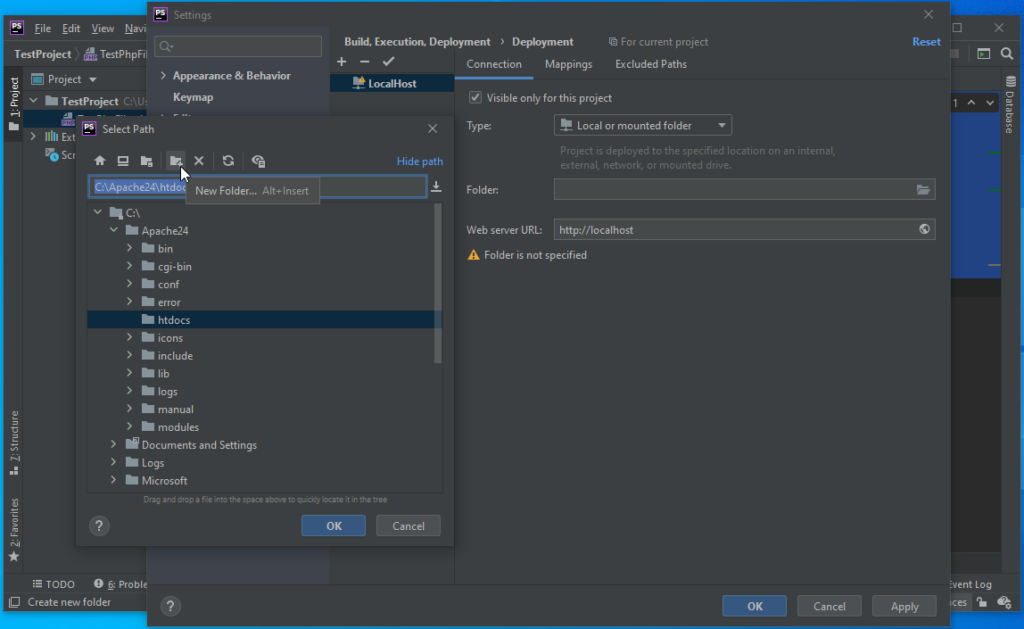
PhpStorm Create New Folder in local host deployment 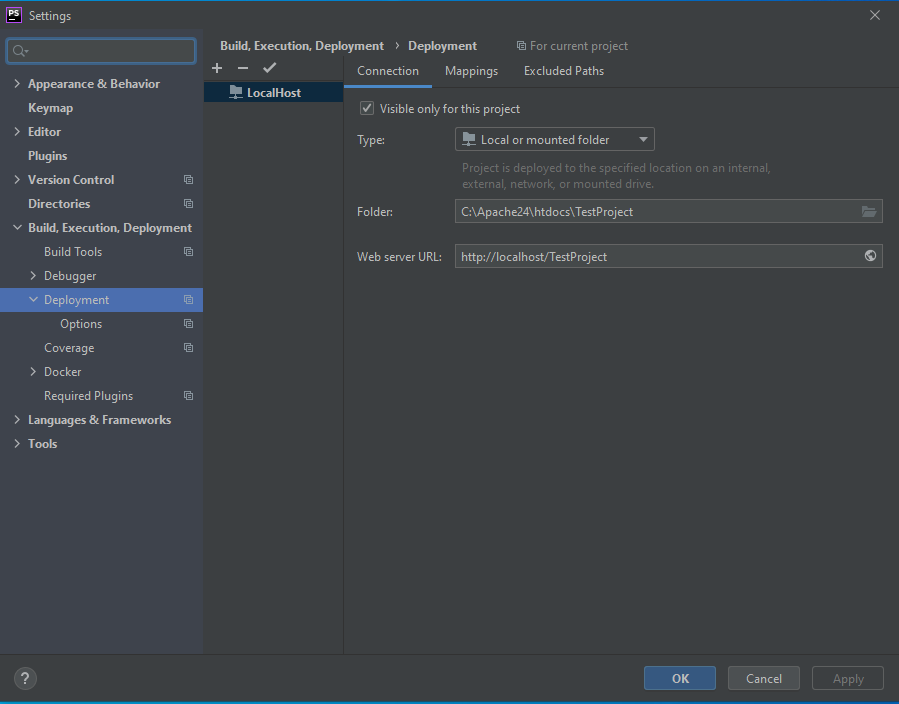
PhpStorm Deployment Connections Tab Complete
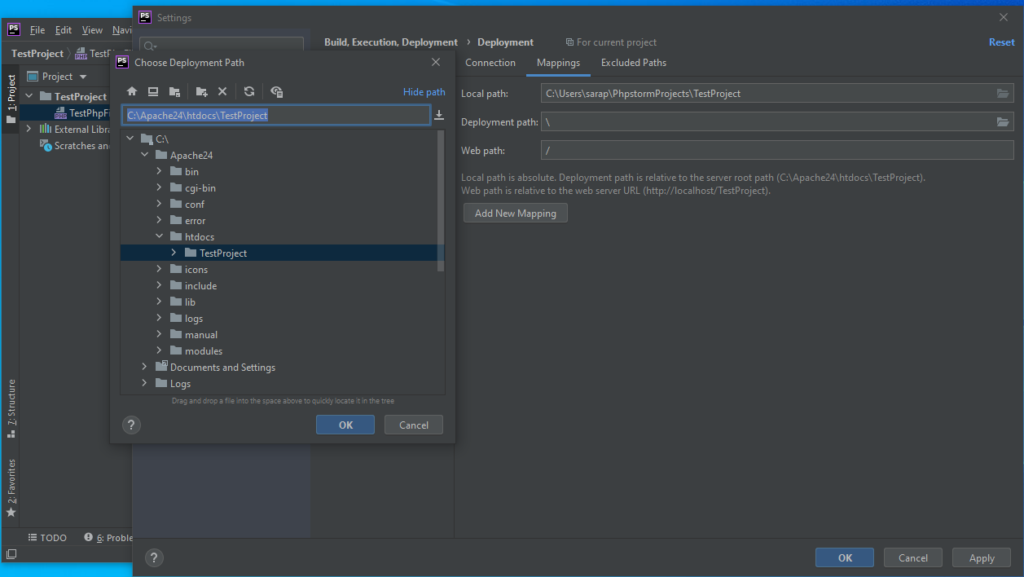
Mappings Tab
- Click on the browse icon in the deployment path
- Choose the folder created in the previous step
- Ensure the web path is set to ‘/’
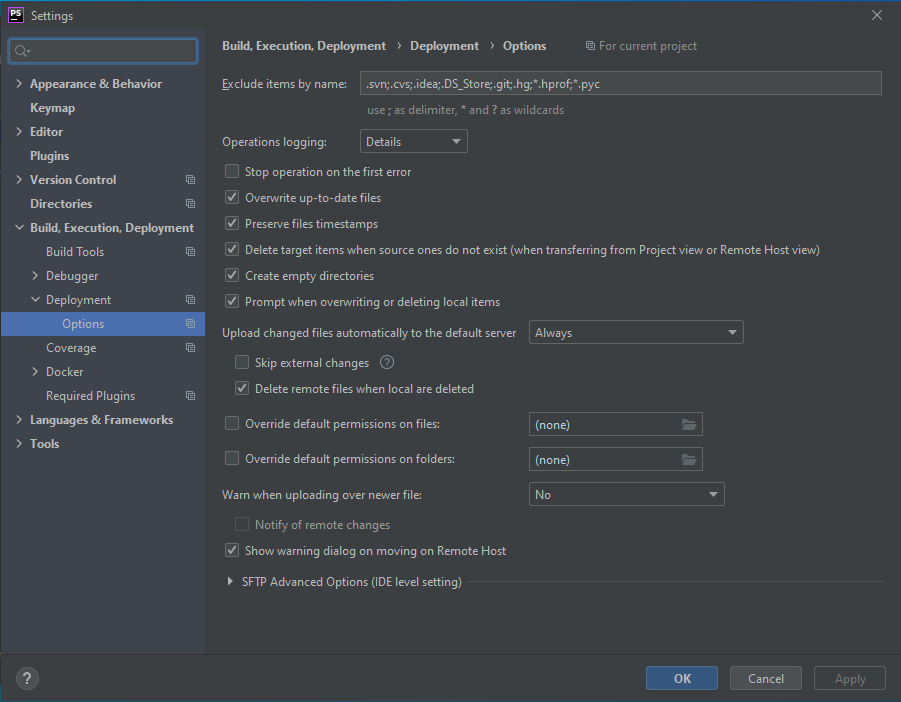
Deployment / Options
- Check to Create Empty Directories
- Check Delete target items when source one’s doe not exist.
- Upload changed files automatically to the default server = always.
- Check Delete remote files when local is deleted
Connection To LocalHost
- Add mounted or local folder
- Folder C:\Apache24\htdocs
- Web server URL http://localhost
- Upload Changed Files Always
- Mappings Deployment Path TestProject
- Mappings Web Path
- Delete Target Files when the source does not exist
- Create Empty Directories
- Delete Remotes When locals are deleted
- Languages & frameworks, Servers, add new localhost
Languages And Frameworks – PHP Sub Menu
PHP
- Php language level = 7.4
- CLI Interperter = php 7.4
- If these options are greyed out, click the browse button and navigate to the main php folder.
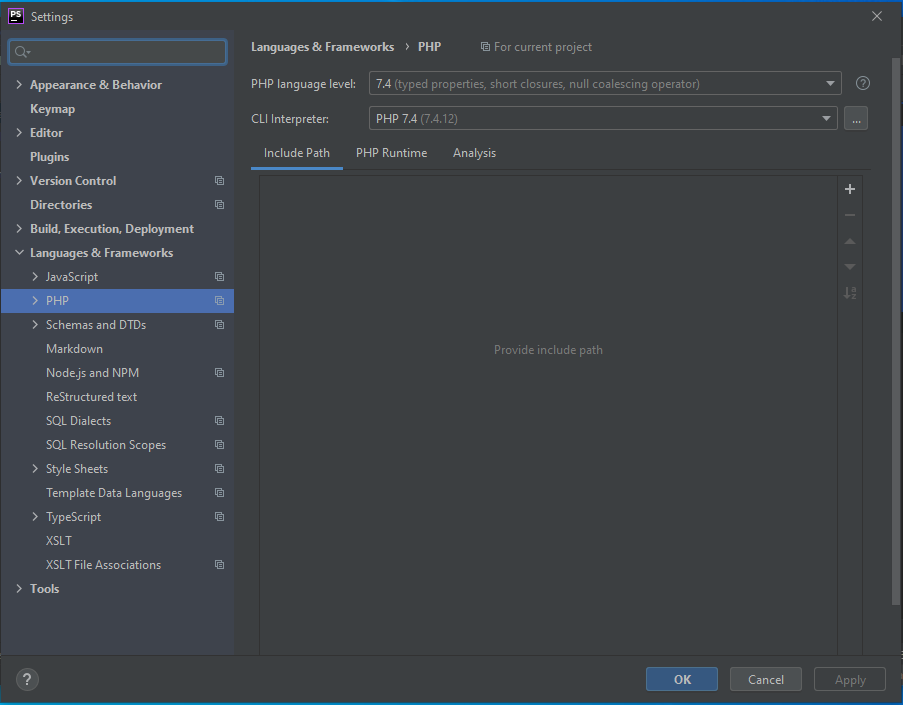
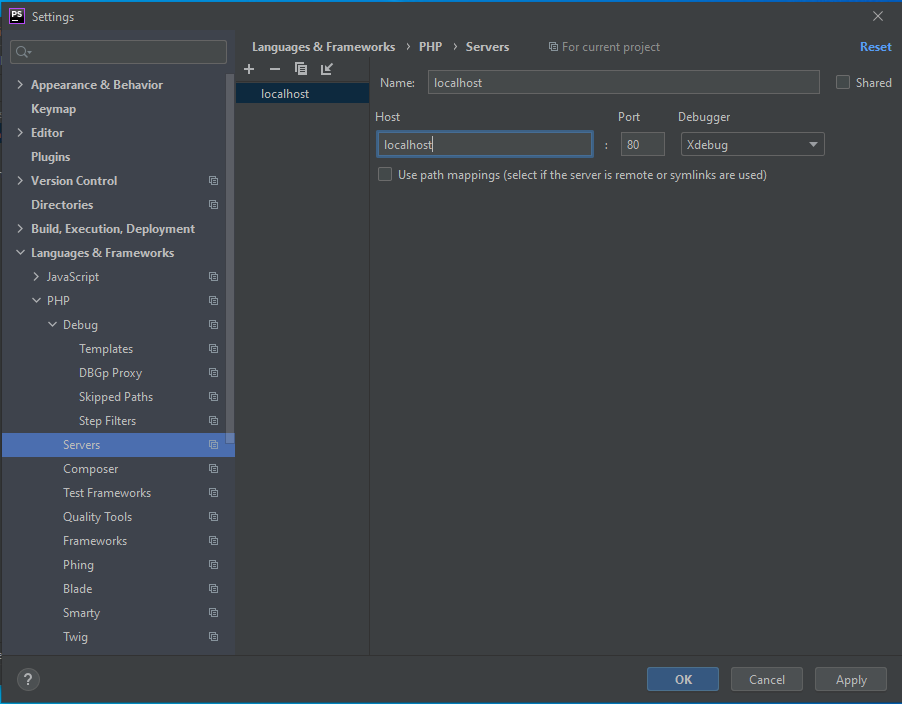
Servers
- Click the + button to add a new server
- Call it localhost
- Add local host to the Host box
Return To The Test File
- Click Apply and OK
- Right-click on the test file
- Choose Debug
- Choose PHP script
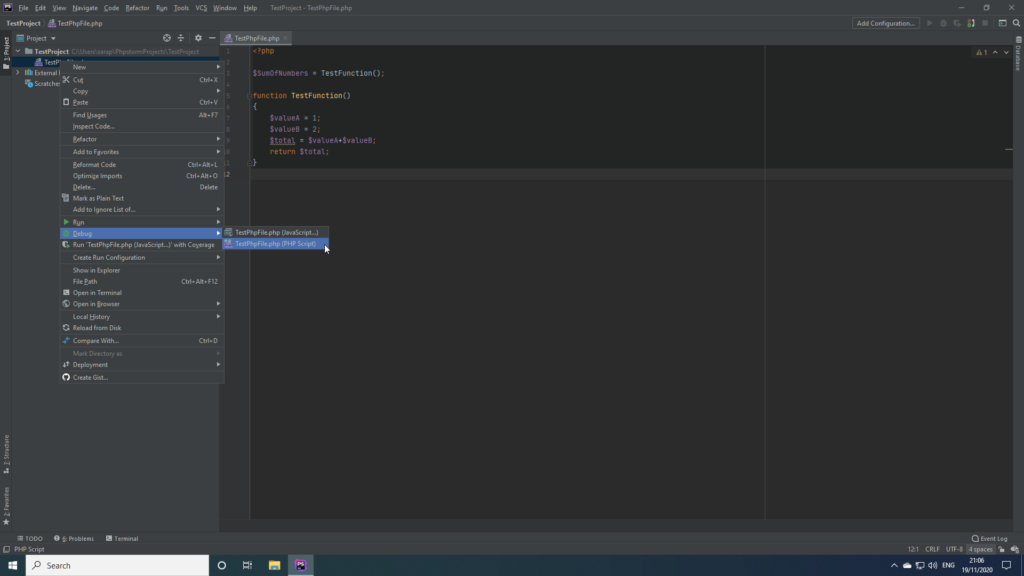
PhpStorm Right Click Debug File 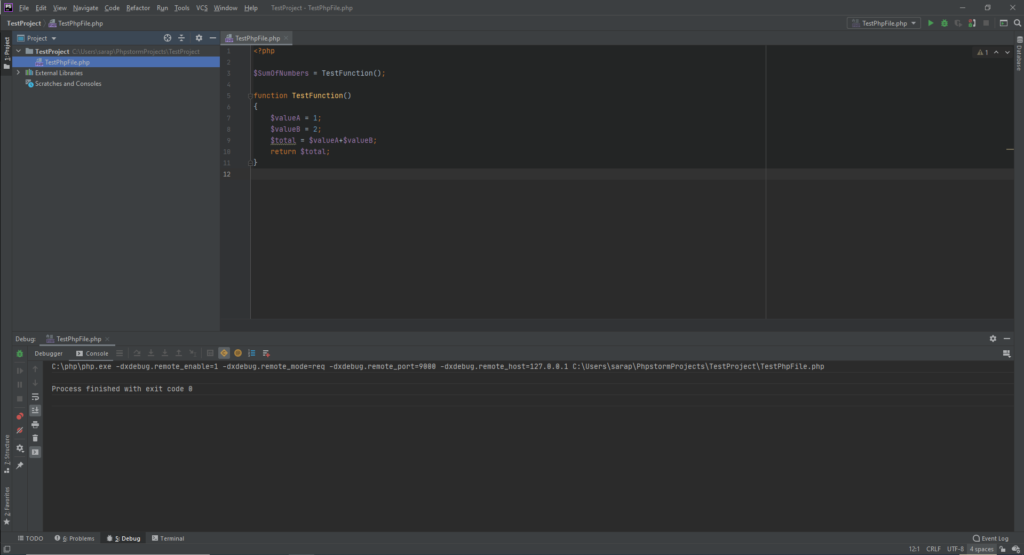
PhpStorm With Debug Output
- Add a break point by left clicking in the horizontal bar next to where you wish to start debugging
- Click the debug icon
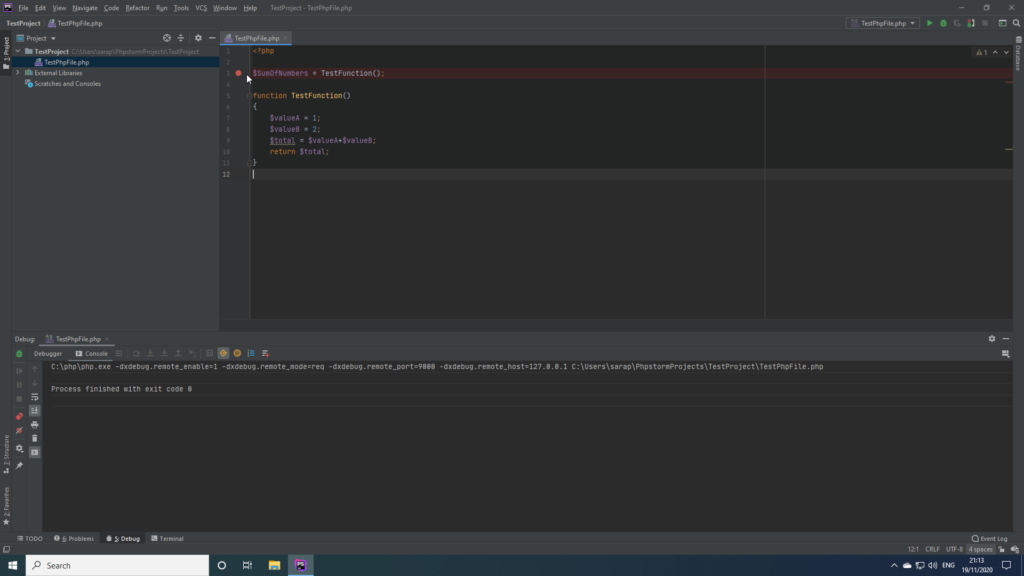
PhpStorm Add A Break Point 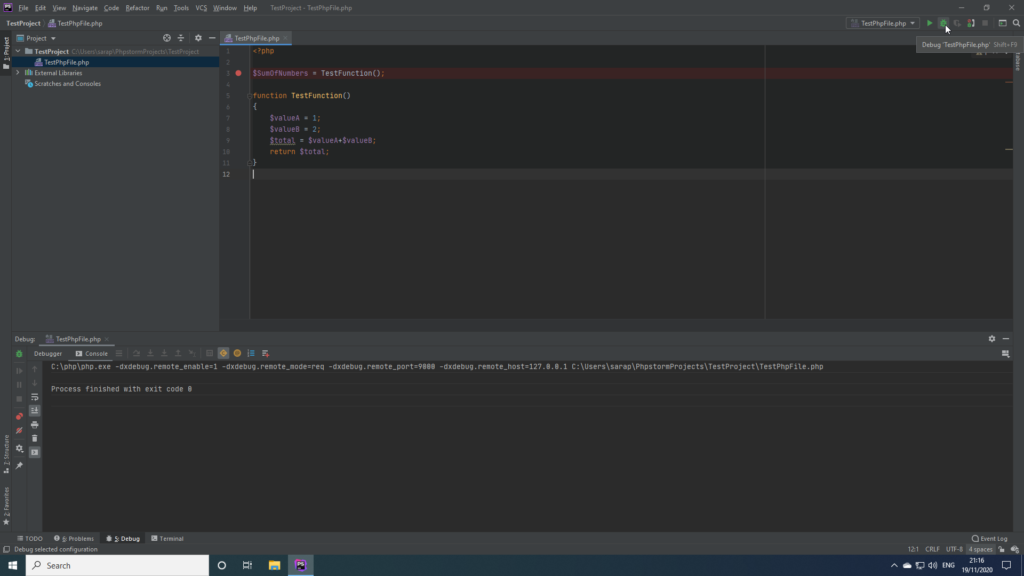
PhpStorm Click The Debug Icon
- Start Stepping into the code
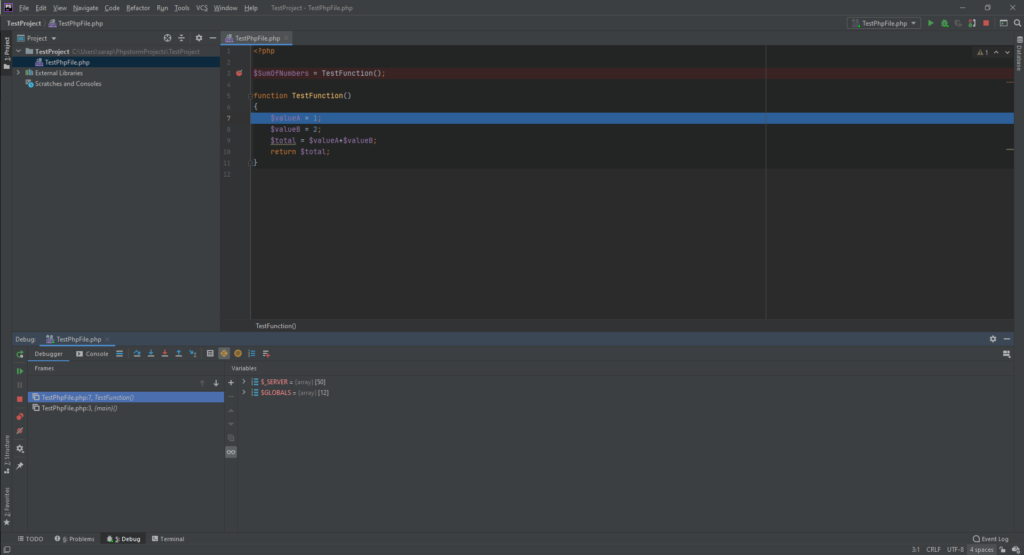
PhpStorm Step Into Click 1 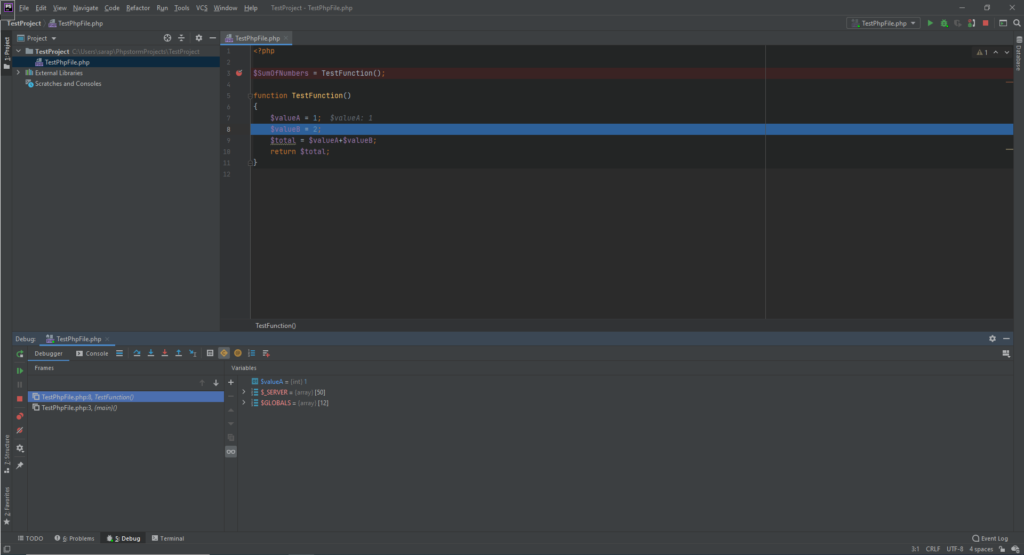
PhpStorm Step Into Click 2 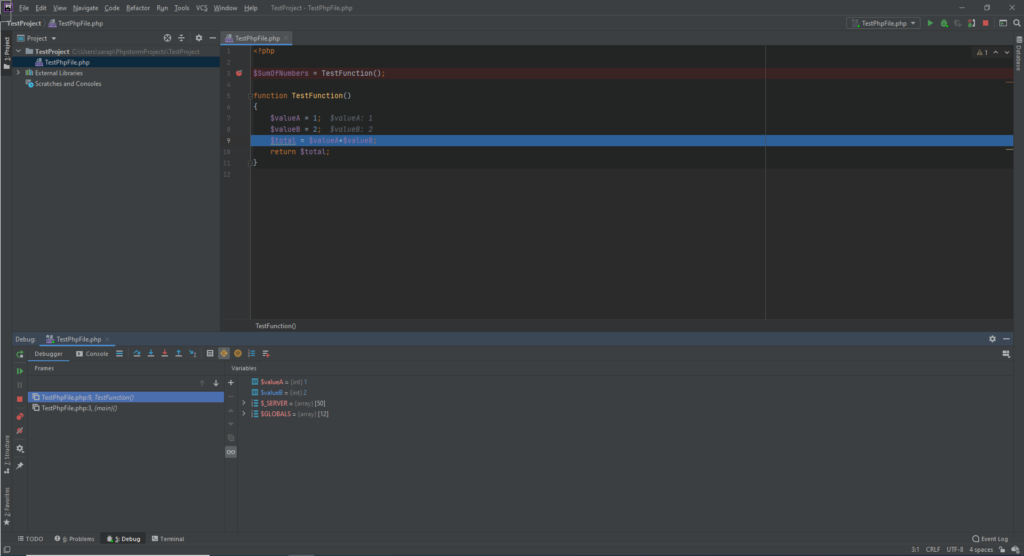
PhpStorm Step Into Click 3 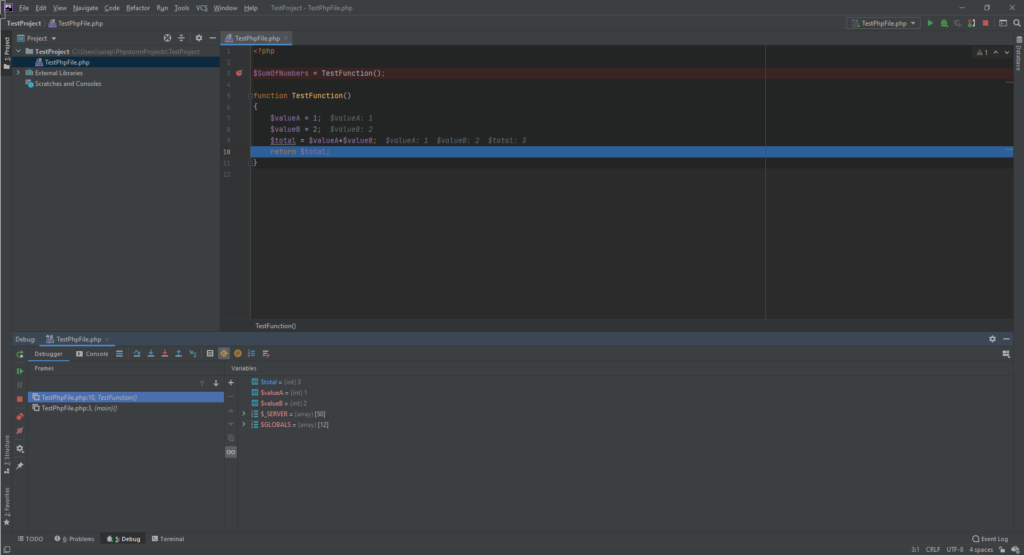
PhpStorm Step Into Click 4
Using Live Edit
Make a small change to the test file so it actually displays something.
<?php

$SumOfNumbers = TestFunction();

echo ($SumOfNumbers);

function TestFunction()
{
    $valueA = 1;
    $valueB = 2;
    $total = $valueA+$valueB;
    return $total;
}
- Save the file to ensure it is written to the localhost folder.
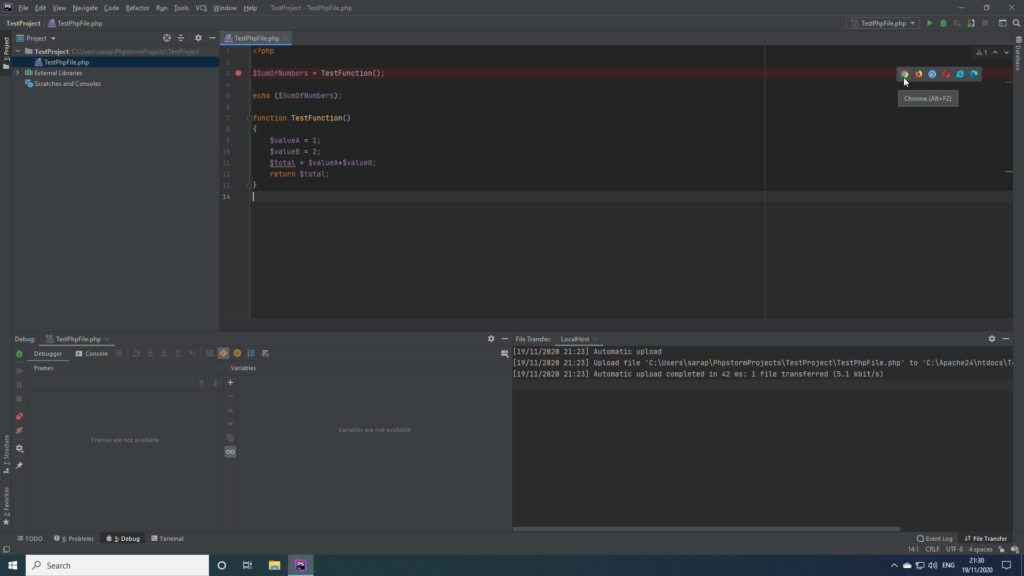
A browser window will open displaying the PHP page. Leave the window open, add another echo statement and click save. Watch the browser window update.
2 thoughts on “PhpStorm Xdebug Setup In Windows”