C# Intermediate Series – Preparation builds on the beginner’s series. However, a few areas of using the different IDEs need covering. This is important because the series begins with methods. Because of this, examining the differences between the .net classic look and top-level statements is a good idea. Top Level Statements came in with .net6 and continue with .net7.
This is important because most tutorials and examples online still use the classic look.
Comparing Top-Level Statements with Classic .Net
C# .Net Classic – – C# Intermediate Series – Preparation
namespace ClassicLook
{
    internal class Program
    {
        static void Main(string[] args)
        {
            Console.WriteLine("Hello, World!");
        }
    }
}
C# .Net Top Level Statements – – C# Intermediate Series – Preparation
// See https://aka.ms/new-console-template for more information

Console.WriteLine("Hello, World!");
Description
At a very simplistic level, it is possible to imagine the two
Console.WriteLine("Hello, World!");
statements to be in the same place with a lot of code hidden. However, the difference isn’t quite that simple and presents a problem. When creating methods, creating a class or partial class is necessary. For more experienced programmers, this will feel trivial and probably more natural than the classic look.
For new programmers, it means diving into many theories about object-oriented programming before writing a method or learning how to create a class without understanding it.
Look at the classic example above; there is a class there already. However, Visual Studio did this automatically, and new coders could easily ignore it.
What is a Method?
A method or a subroutine is a name for a block of code with one or more instructions. We can then use the name to execute the code block. The method below uses the classic look, and the ‘Console.Writeline’ has moved into a new method called ‘MyMethod’.
Classic Look with a method
namespace ClassicLook
{
    internal class Program
    {
        static void Main(string[] args)
        {
            MyMethod();
        }

        static void MyMethod ()
        {
            Console.WriteLine("Hello, World");
        }
    }
}
New coders learnt methods by always using the static keyword initially, again typically without understanding it until later; it was just something there. With top-level statements, we must either add a partial class or create a whole class before writing a method.
Top Level Statement Partial Class Example
// See https://aka.ms/new-console-template for more information

MyMethod();

public static partial class Program
{
    public static void MyMethod()
    {
        Console.WriteLine("Hello, World!");
    }
}
The Problem with this Approach
Traditionally, students would have one keyword they didn’t understand (static), which often led to issues getting out of using the static keyword. However, if we manually add partial classes, there are now three concepts without understanding (class, partial class and static).
The alternative is to create a class and work inside it. Future tutorials in this series will create a class and work inside the class.
C# Solution Structure
Every C# solution has a structure; however, we will only look at Console applications for now. It works like a tree and is based on the file structure you will be used to seeing in all operating systems. It starts with a directory (folder). Then, in turn, the folder will have files and sub-folders inside it.
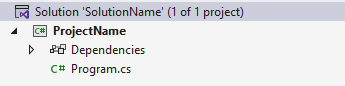
The top folder matches the name of the solution. Then, inside the solution folder will be a file with a .sln extension and a name that usually matches the solution folder’s name.
There will then be one or more folders that are the name of the projects. The first project added by default matches the name of the solution.

The same information can be seen in the solution explorers of Visual Studio, Rider and VsCode.


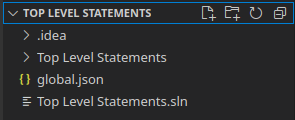
Entering the Project folder reveals more files and folders. The ‘bin’ folder is where the compiled program will go. The ‘obj’ folder has items automatically saved by the IDE and is not necessary to run the program. Then there are two files (in a new project).
In the example image below, ‘Program.cs’ is the initial class called program. and the TopLevelStatement.csproj is the file that defines project settings. Additionally, we can see this same information in the solution explorers by expanding them.
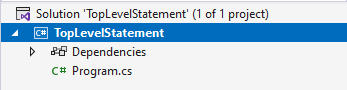
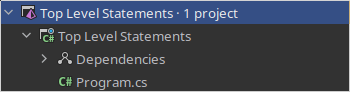
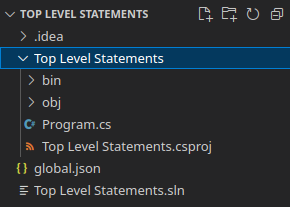
The result is a structure that goes Solution – Project – Class, even if, typically, some of those names may match each other. It’s also necessary to understand that a solution can have many projects and that a project may have many classes.
Creating A Class – – C# Intermediate Series – Preparation
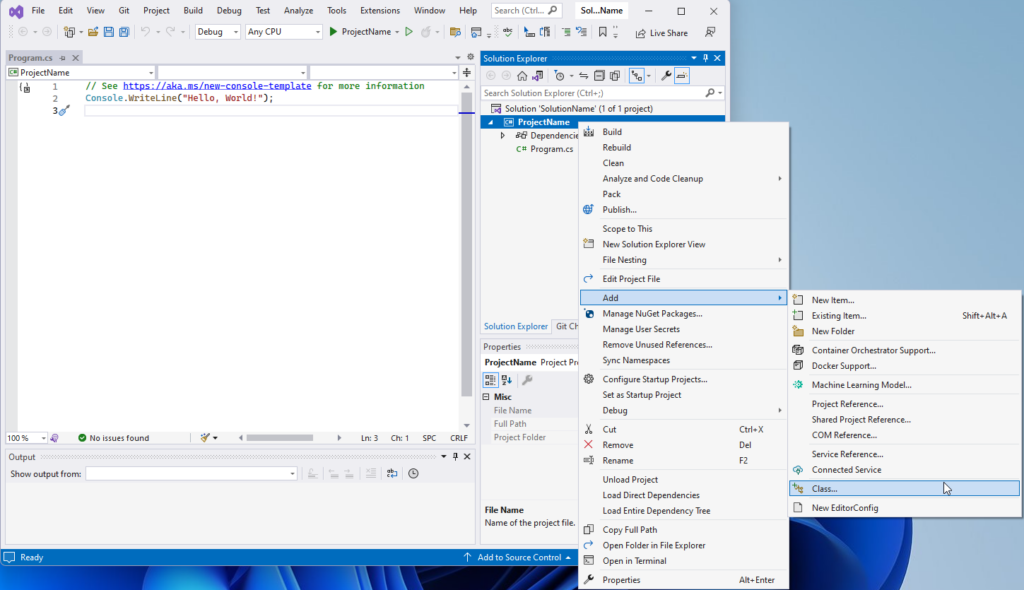
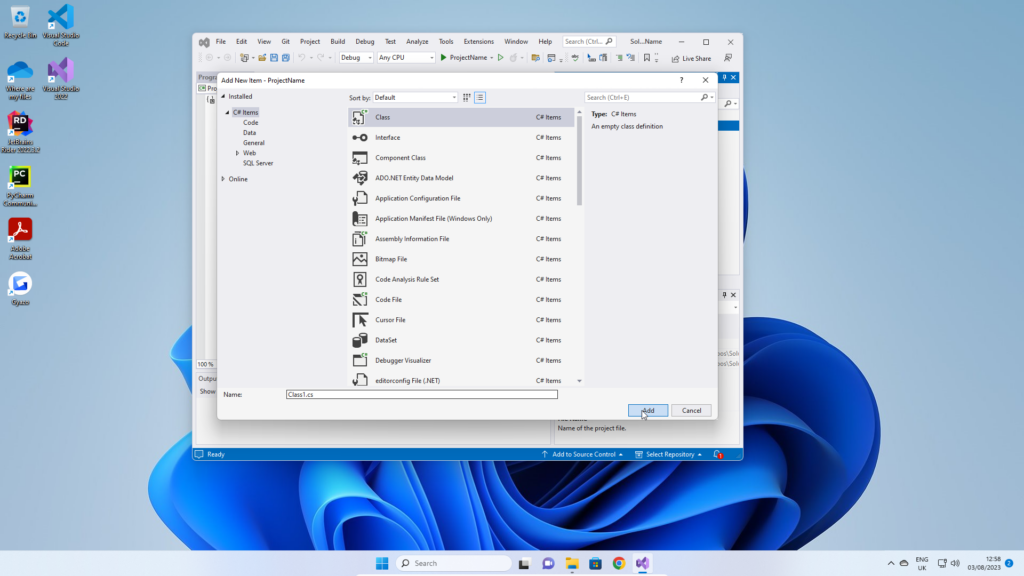
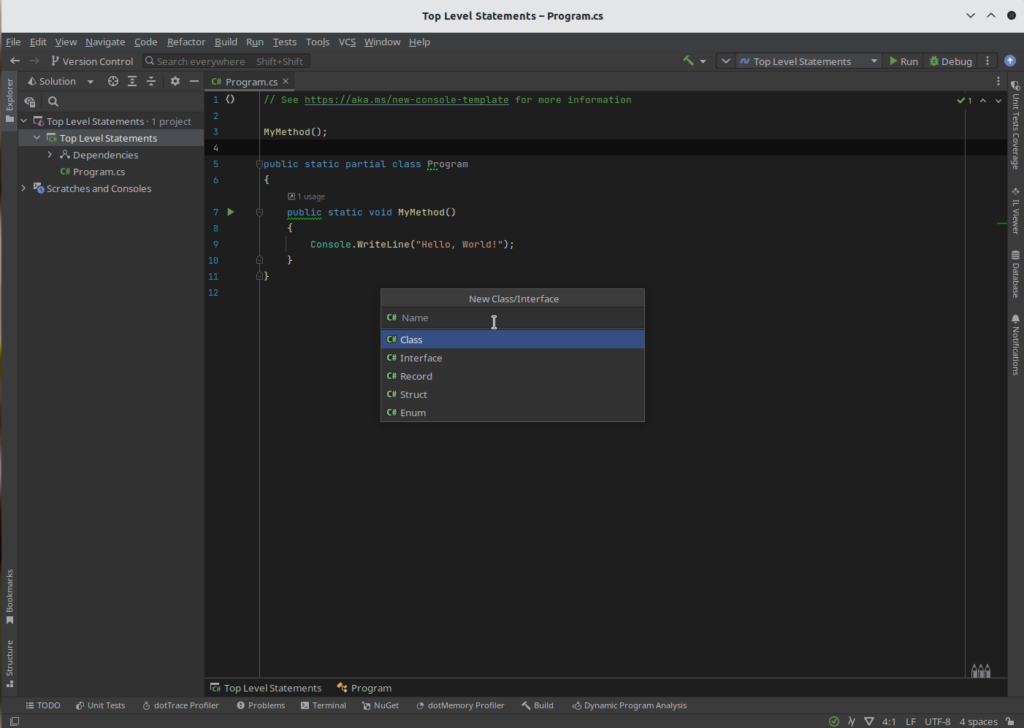
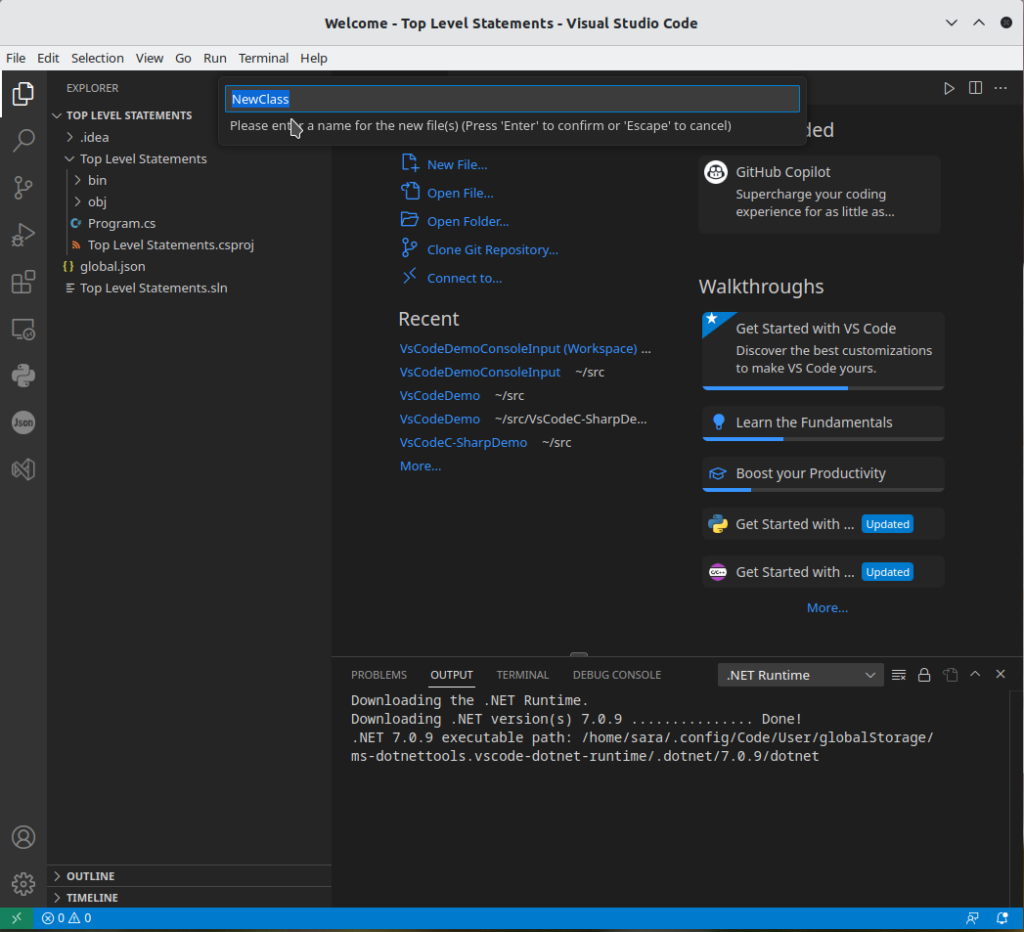
Creating a class follows the same basic principle with all three IDEs. Find the solution explorer, right-click on the project and choose a new class. Finally, give the class a file name and save it. Of course, they are all very different-looking IDEs, so this is found in different places.
Visual Studio
Rider
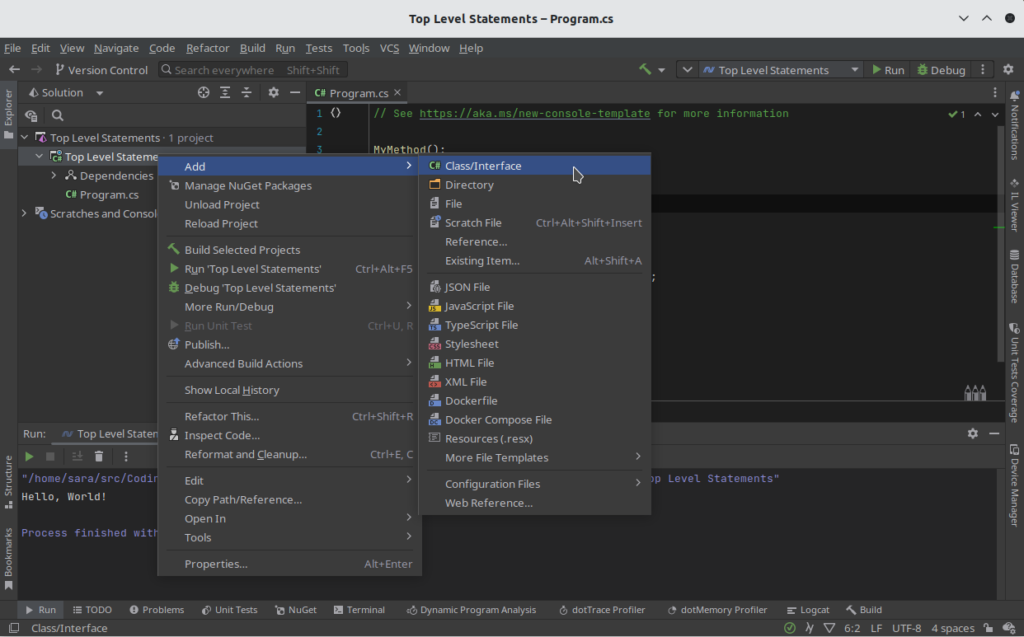
Visual Studio Code

First Look At a Class – – C# Intermediate Series – Preparation
Unfortunately, the differences between IDEs do not stop at creating a class. The initial look and apparent structure of the class differ.
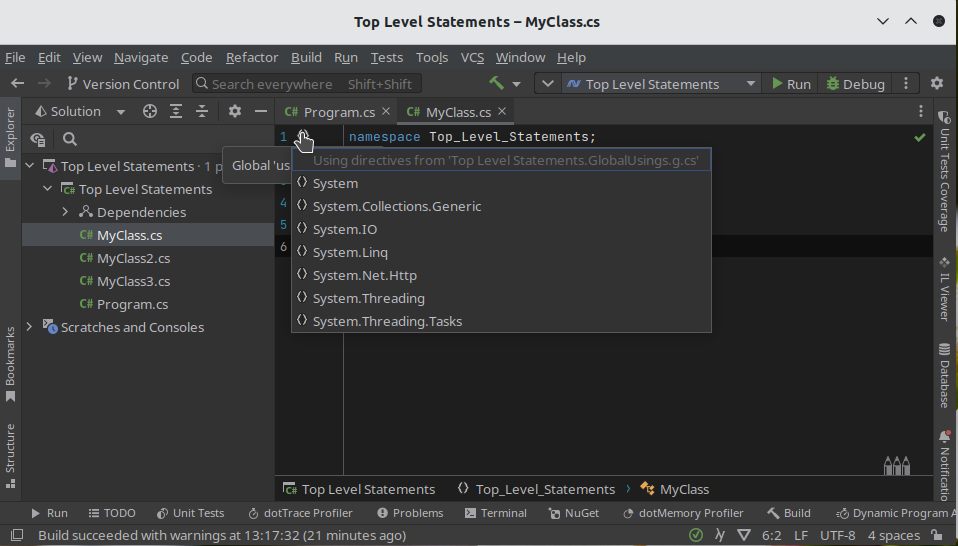
Visual Studio and VsCode
using System;
using System.Collections.Generic;
using System.Linq;
using System.Threading.Tasks;

namespace Top_Level_Statements
{
    public class MyClass3
    {

    }
}
VsCode
using System;
using System.Collections.Generic;
using System.Linq;
using System.Threading.Tasks;

namespace Top_Level_Statements
{
    public class MyClass3
    {

    }
}
Rider
namespace Top_Level_Statements;

public class MyClass
{

}
Despite the visual differences, they are essentially the same. In Rider, there is a symbol to the left of the namespace; clicking on it reveals the same initial using statements found in Visual Studio and VsCode. The namespace declaration is also there; it is only a syntax difference.
There is also a difference between Visual Studio and the other two. Visual Studio sets the class to internal, but VsCode and Rider default to public. These differences are not crucial at this stage unless you switch between IDEs. Public, private, internal and protected are accessors. Accessors will be covered in the object-oriented tutorials.
Structure Of A Class – – C# Intermediate Series – Preparation
A class has three core sections:
- Member variables, which are also known as attributes or properties.
- Constructors, which set initial values for the member variables and any methods to run when the class starts. Technically, this is when an object is instantiated from the class, but that is covered later.
- Methods
Visual Studio Example
using System;
using System.Collections.Generic;
using System.Linq;
using System.Text;
using System.Threading.Tasks;

namespace ProjectName
{
    internal class MyClass
    {
        private string strMemberVariable;
        private int intMemberVariable;
        private double dblMemberVariable;

        public MyClass()
        {
            StartHere();
        }

        private void StartHere()
        {
            Console.WriteLine("This runs first");
        }
    }
}
VsCode Example
using System;
using System.Collections.Generic;
using System.Linq;
using System.Threading.Tasks;

namespace Top_Level_Statements
{
    public class MyClass3
    {
        private string strMemberVariable;
        private int intMemberVariable;
        private double dblMemberVariable;

        public MyClass3()
        {
            StartHere();
        }

        private void StartHere()
        {
            Console.WriteLine("This runs first");
        }
    }
}
Rider Example
namespace Top_Level_Statements;

public class MyClass
{
    private string strMemberVariable;
    private int intMemberVariable;
    private double dblMemberVariable;

    public MyClass()
    {
        StartHere();
    }

    public void StartHere()
    {
        Console.WriteLine("This runs first");
    }
}
They Are All The Same Really – – C# Intermediate Series – Preparation
These differences are only about the default settings of each IDE. The code from any above can be copied and pasted into any other IDEs, and it will still work. I have pointed them out to help new coders understand some differences they may encounter when looking at examples in other places. Also, to help people that may be forced to use one IDE or another.
Starting the class (Instantiating the object from the class)
The final stage is to add code to ‘Program.cs’, which will start the new class (simplified language). This is known as instantiating an object by creating an instance of the class. However, it is far less complicated than it sounds. This stage requires a single line of code in ‘Program.cs’.
// See https://aka.ms/new-console-template for more information
using Top_Level_Statements;

MyClass myClass = new MyClass();
Future Tutorials – C# Intermediate Series – Preparation
All future tutorials in this series will use this format. A single line in ‘Program.cs’ will create a new class instance. The class will have a constructor that points to a method.