Introduction
C# Beginners – Start Coding; this post will guide you through your first steps in creating a working C# program. The post assumes that you have the Dot Net SDK installed on your system and have chosen an IDE. It also takes you to be familiar with creating a new C# Solution using your preferred IDE. Please see C# Beginners – IDE Choice if any of these are false.
Next, a couple of further notes, every post in this series will use DotNet6 LTS (the current long-term support version at the time of writing) and start by using top-level statements. The code should run equally well in any version of Dot Net, but it is worth comparing the starting point with and without top-level statements. A video version of this tutorial is available at the bottom of the blog post or by clicking here.
Top-Level-Statements – C# Beginners – Start Coding
I have chosen to consistently use top-level statements for a couple of reasons. Firstly the guide is aimed at beginners, so the new way should be their way to move forward. Secondly, anyone using Vs-Code or Rider rather than visual studio will be given the top-level-statement version without an option. Finally, it is the default option in Visual Studio. It could be argued that more online examples use the old format, but I feel the reasons for starting from top-level statements are stronger.
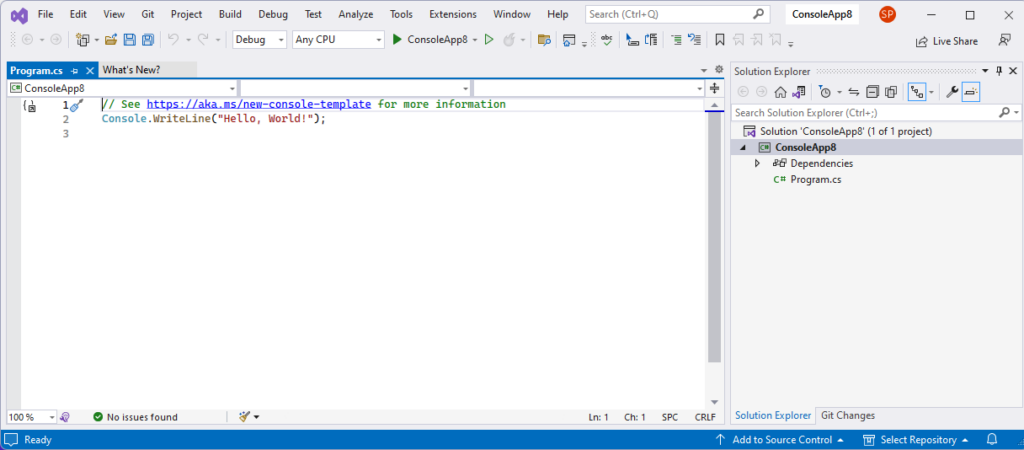
Top Level Statements (new starting point)
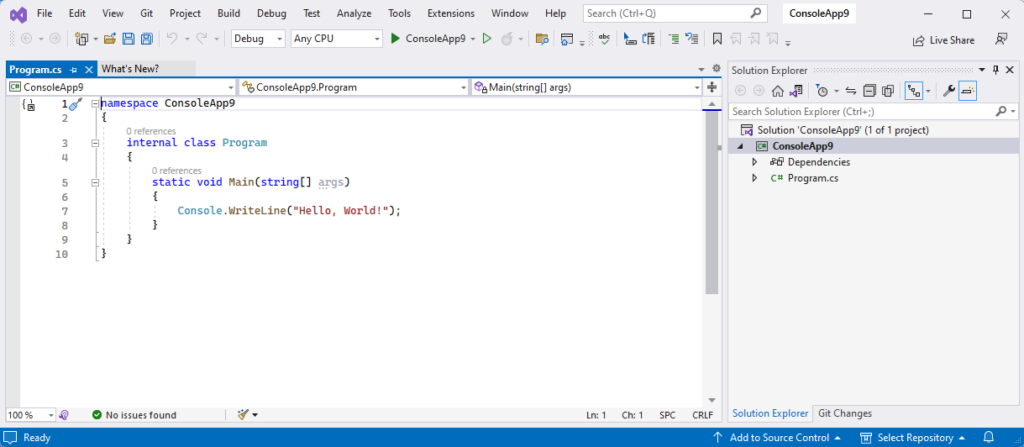
Do Not Use Top Level Statements (old starting point)
Hello World – C# Beginners – Start Coding
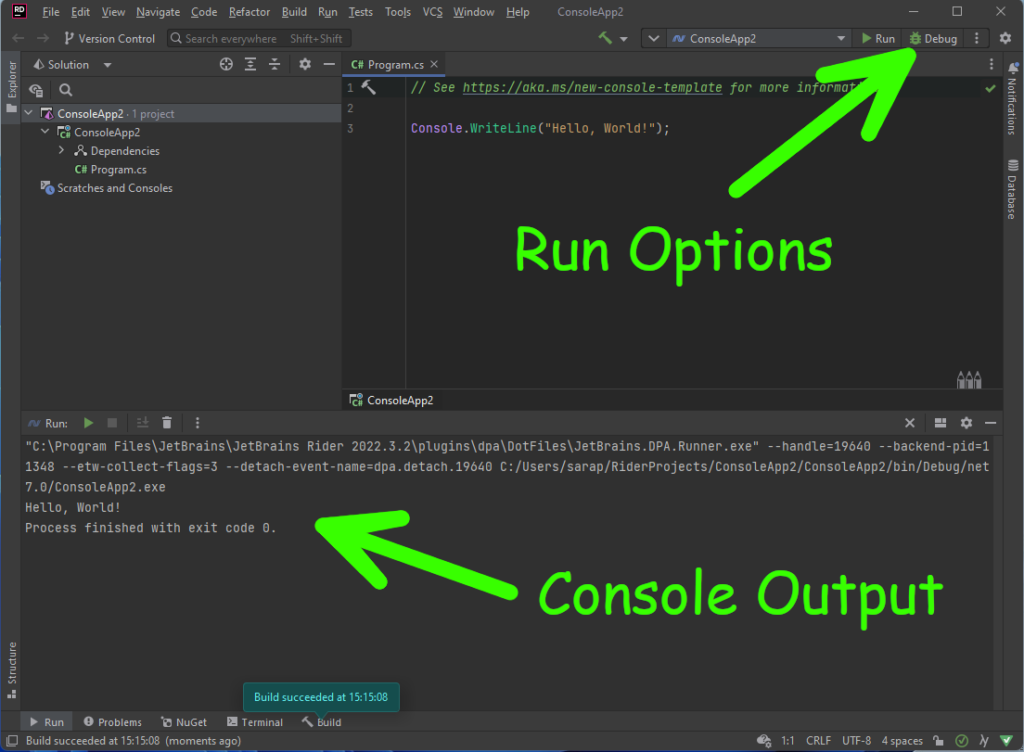
Hello, World is the classic starting point for almost every programming tutorial. It is also the default starting point for a new C# solution. The program outputs the words “Hello World!” to the console. You can see it in the code snippet below and the two images above.
// See https://aka.ms/new-console-template for more information
Console.WriteLine("Hello, World!");
The console has many options, and WriteLine is one of the options that outputs a single line of text to the console. The text that gets output goes inside the brackets.
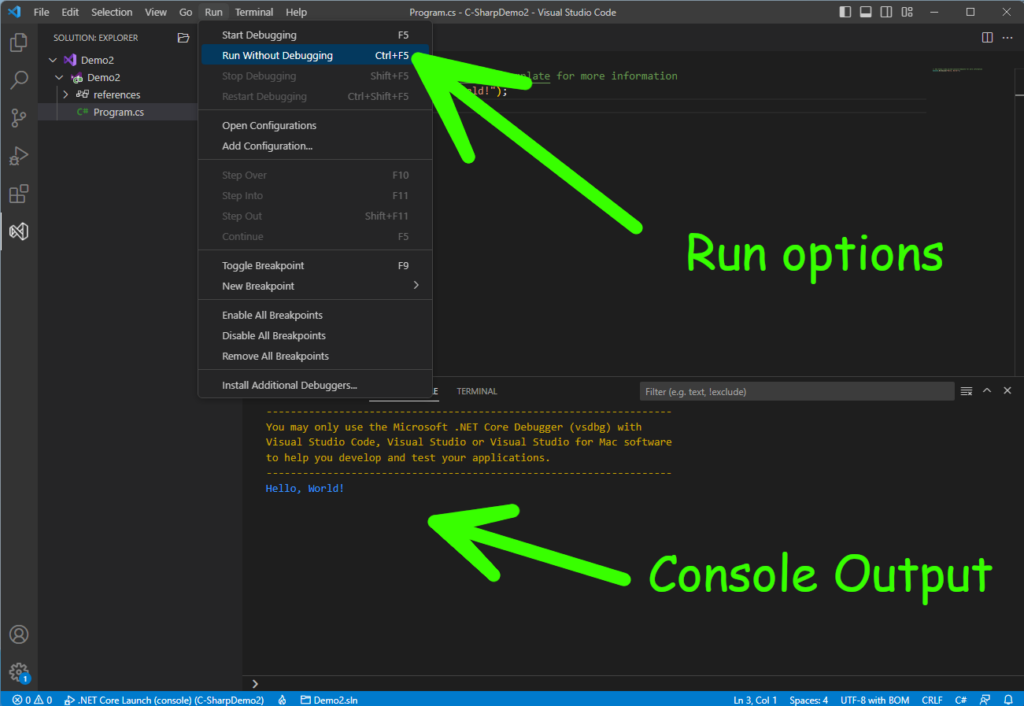
In future posts, I assume you know where to find the run button and output in your chosen IDE. First, however, I will add images for all three IDEs below. It is also worth noting that all three IDEs use duplicate shortcut keys.
- F5 Runs the program with Debugging.
- Ctrl+ F5 Runs the program without Debugging.
Hopefully, you will also notice the semi-colon at the end of the command. This must always be present at the end of each instruction.
Visual Studio
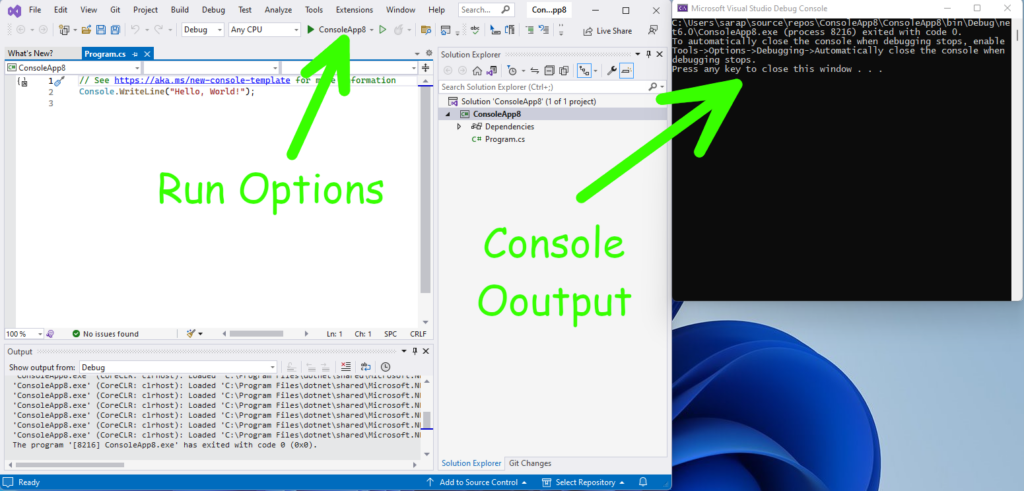
Microsoft Visual Studio acts a little differently from the others. First, it opens a new console window, and the output is seen there.
VsCode
Rider
C# Data Types
I will be covering data types more fully in a later tutorial. However, from the beginning, stating that C# is both Statically and Strongly typed by default is essential. That simply means that the Data type must be specified by the programmer. This may seem a little alien for anyone who started with a language like Python. Therefore, I will only use the ‘string’ type for today’s first lesson. Which simply means text.
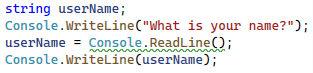
Creating A Variable And Taking User Input – C# Beginners – Start Coding
string userName;
Console.WriteLine("What is your name?");
userName = Console.ReadLine();
Console.WriteLine(userName);
Variables
Variables are just a place to store data. You can think of variables as a box with a label on it. A container can hold one type of item only.
In the code snippet above, first, the variable type is defined by the word ‘string’, and the variable name is set to ‘userName’.
Secondly, Console.WriteLine outputs the question to the console.
Third, it stops and waits for the user to type; when the user hits the enter or return key, anything they typed is assigned to ‘userName’, like putting it in the box.
Finally, another Console.WriteLine outputs the content of the variable called ‘userName’ to the console. Notice how there are no speech marks in the last line. That is because it is outputting the content of the variable instead of a fixed string.
IDE Warnings
When you put this code into your IDE, it should underline part of the code. This is a warning that there is a potential problem with the code. The colour of the warning will vary between different IDEs and even different customisation with the same IDE.
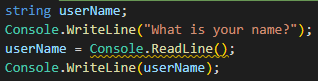
Ignoring IDE warnings is not a good idea, but the messages presented to users are usually confusing for new programmers. Try hovering the mouse over the underline in any of these IDEs, and it will give you a description similar to the image below from Visual Studio.
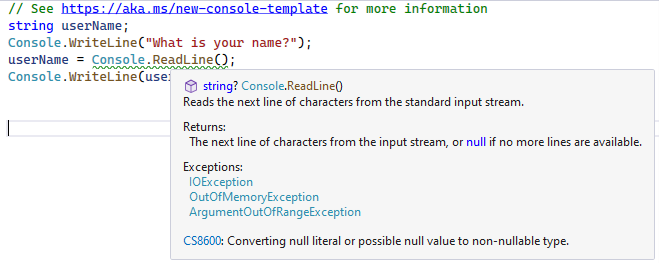
I don’t wish to dive too deep into all that jargon. Neither do I think any of that message is helpful to a new programmer.
For example, there is a data type called Null. Null is the absence of anything. Think of null like a vacuum in space. There is nothing there at all.
The warning states that if you wish to allow for the possibility of getting Null (nothing) back, then I want you, as the programmer, to explicitly state this is ok. We can tell the IDE this is ok by adding a question mark at the end of the type.
See the code below for how to fix this.
// See https://aka.ms/new-console-template for more information
string? userName;
Console.WriteLine("What is your name?");
userName = Console.ReadLine();
Console.WriteLine(userName);
More On IDE Warnings – C# Beginners – Start Coding
Usually, when an IDE underlines an issue, if you click on the highlighted area, another icon will pop up that you click on for suggestions. Unfortunately, with this particular error, neither Visual Studio nor VsCode offers anything. However, Rider does.
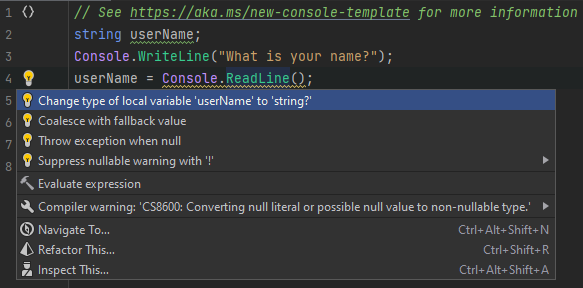
This is one way in which I consider Rider to be better than Visual Studio. I am not claiming that it is impossible to make Visual Studio more helpful, but as a default offering, Rider is doing more to help new programmers.
These kinds of warnings about nullable strings are relatively new. Therefore, when looking at online examples, you will likely see others that show similar warnings.
Therefore I felt it essential to show what it is and how to fix it. There are better fixes which we will cover later in the series.
Video Version
Related Articles – C# Beginners – Start Coding
- C# Beginners Introduction
- C# Beginners – IDE Choice
- C# Beginners – Using Visual Studio
- C# Beginners – Using Vs-Code
- C# Beginners – Using Rider
- C# Beginners Variables & Types
- C# Beginners – User Input
- C# Beginners – If Else Selection
- C# Beginners – Switch Statement
- C# Beginners – Try/Catch/Finally
- C# Beginners – Lists And Arrays
- C# Beginners – Loops
10 thoughts on “C# Beginners – Start Coding”